Create a Hub

How to Create a Hub with XLhub

Overview

This guide describes how to create a hub. A hub integrates your Excel spreadsheet to the database without the need for programming knowledge.

Audience

Users of XLhub who will be retrieving data, saving data, or creating hubs

Flow of Events

1. Define a Table

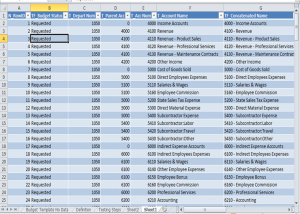
Before using XLhub, you need to transform your data into a table:

1. Open the Excel spreadsheet with the data you want to hub.

2. Select the data you wish to create into a table. Be sure to include the column headers in your selection, as shown.
3. Once selected the data is selected click the Insert tab. In the Tables section of the Insert ribbon click Table. Alternatively, press CTRL+T as a shortcut.
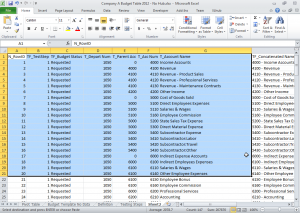
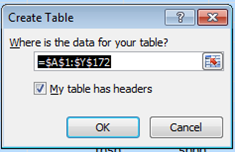
A “Create Table” dialog box will appear. Be sure that the “My table has headers” check box is checked. Click OK.
4. Your data should now be formatted as a table and look similar to the table shown below.
5. Name your table by clicking on the Table Tools tab. At least one cell in your table must be selected to view this tab. Enter a table name in the field in the upper left corner (located in the Properties section of the Table Tools ribbon).

NOTE: Use a descriptive name for your table. The name you choose must be unique in order for a new hubbed table to be created.

2. Start Wizard

You are now ready to start the XLhub wizard.

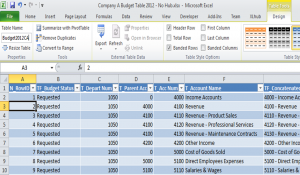
1. Click the XLhub tab at the top of your screen.

2. Make sure at least one cell in your table is selected. In the Admin section of the ribbon, click the Table Management icon and select Create New Hub.
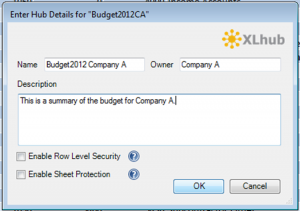
3. Name the Version

1. An initial dialog box will appear. Provide a name for the hub, the owner of the hub, and a description of the hub to help make future retrievals simpler. Click OK. This will be the name of the hub in the database.
NOTE: Be sure to give the hub a different name from any of your past hubs with XLhub.
2. Provide appropriate credentials and server information in the “Configure Database Connection” box. Click OK

4. Set Column Type

1. A window will appear displaying XLhub’s creation progress. Depending on the size of your table, it may take a few minutes to complete.
2. Once complete, you will see that the window has been populated with information about XLhub’s assumptions for each column in your table.
From the window (shown in the previous image) you can change XLhub’s assumptions about the data in your table columns. For example, you can :

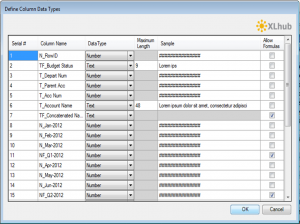
  • Select a different data type from a drop down list
  • Adjust the maximum length for each entry
  • Choose whether the cell will allow formulas

NOTE : This is the only chance you have to change these settings.

Once you are satisfied with the settings for the columns of your table, click OK.

3. A dialog box called “Please Restart Excel” will appear when the process is complete. Click OK.

5. Save Your Data and Restart Excel

1. Completely exit Excel.
2. Be sure to save your Excel file when prompted.
3. Reopen the Excel file. In the XLhub tab you will have access to your newly created hub.

Congratulations!

You have successfully hubbed a table with XLhub!

Learn to utilize all of XLhub by reading other How To Tutorials and by viewing the Application Videos.

LIVE CHAT

Contact

Phone

248.690.5250

Mail

contact@metricx.com

Address

Metric-X, LLC Rochester, Michigan 48307